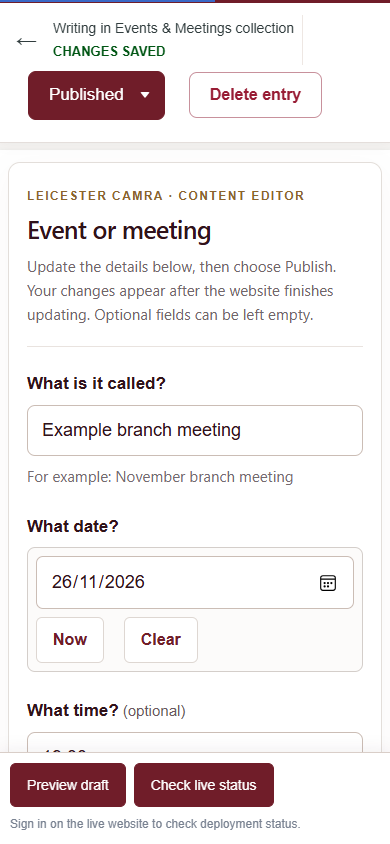
The screenshots below use a practice entry. Your real events will have their own names.
1. Choose what you want to update
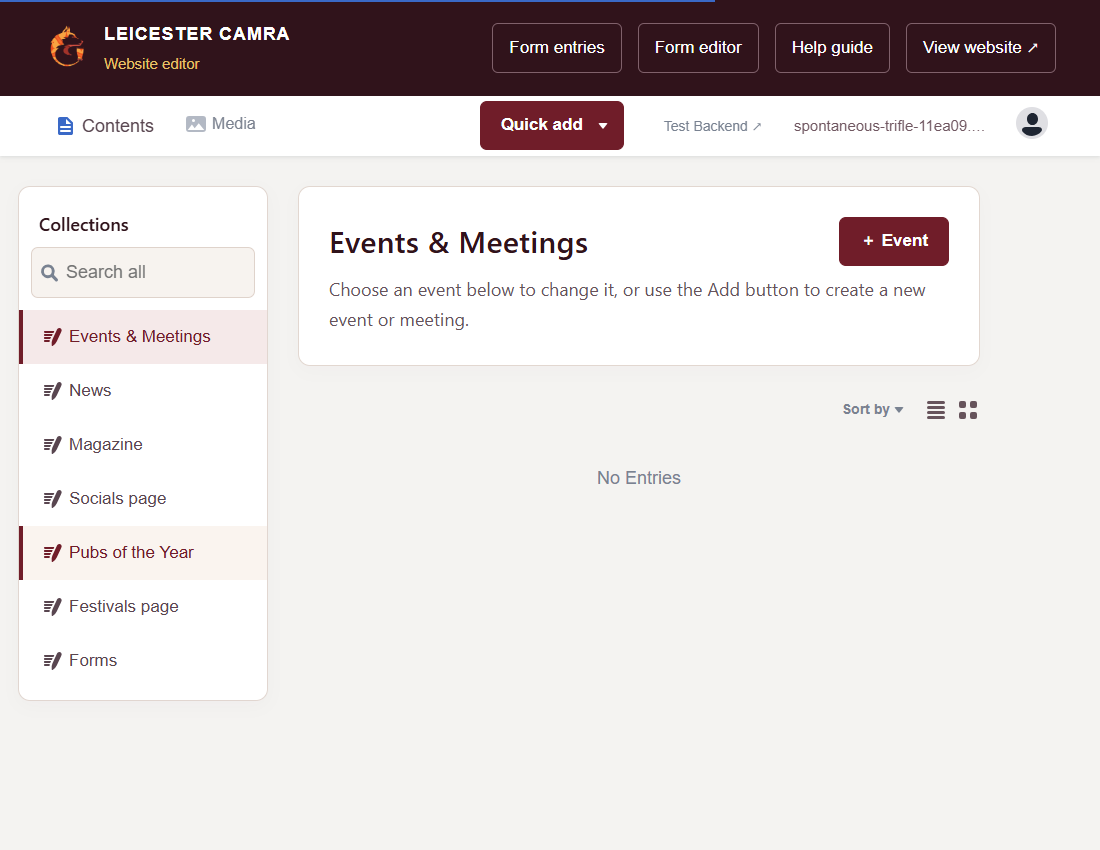
Open Editor login in the website footer. Sign in using your invited account. Choose Events & Meetings, then + Event to add something new.
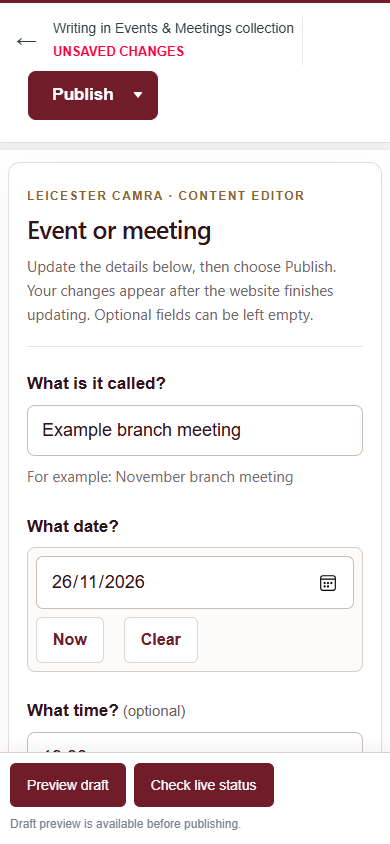
2. Fill in the details
- Enter a clear event name, date and time.
- Give the venue and the exact meeting point.
- Choose Meeting, Social, Festival or Other.
- Add the price and booking contact if needed. Use Booking information for messages such as “Fully booked — waiting list available”.
- Write a short introduction, followed by any extra details.
Leave Show this on the website switched on unless you want to hide the entry.
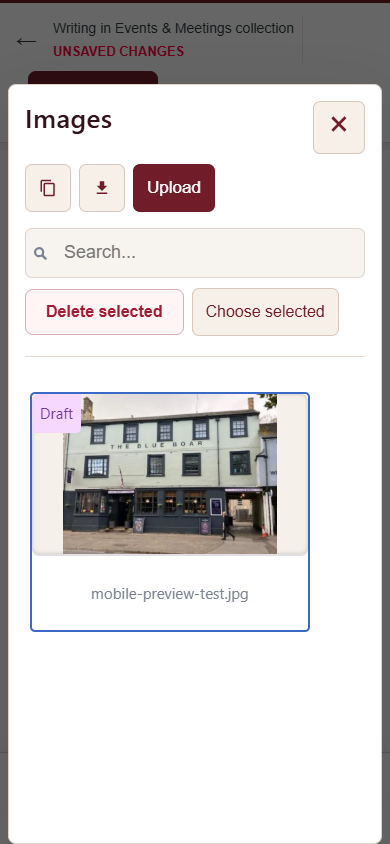
3. Choose a photo
- Under Add a photo, press Choose an image.
- Select an existing photo, or press Upload to choose one from your phone or computer.
- Press Choose selected.
- Check that the correct picture appears in the form before publishing.
JPG and PNG are good choices. If your phone picture is HEIC, export it as JPG first.
Remove image removes the photo from this entry. Avoid Delete selected in the shared photo library: other pages may still use that photo.
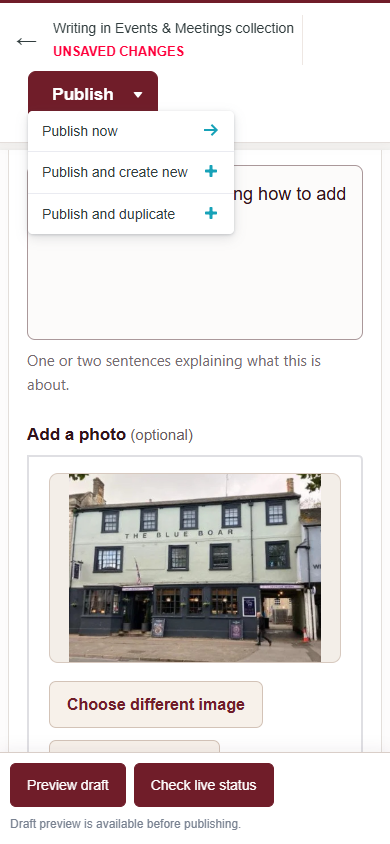
4. Publish your changes
- Check the date, time, venue and photo.
- Press Publish at the top.
- Choose Publish now.
- Wait for Entry saved or Published.
- Allow a few minutes for the website to rebuild, then check the public page.
“Changes saved” alone is not confirmation that a new change is live. Use Publish → Publish now.
If publishing reports an error, keep the editor open and ask the website administrator for help.
Change or delete an entry
To change it: open the correct section, select the entry, edit the details, then choose Publish → Publish now again.
To delete an event: open it, press Delete entry at the top and confirm. Only do this if it should be removed altogether.
To cancel an event: change “Is this event going ahead?” to No — cancelled and publish. This lets visitors see the cancellation.
Old events are automatically removed by the daily cleanup after four full days following the event date.
News entries can be hidden using Show this on the website. The News section does not offer permanent deletion.
Updating the Festivals page
- Choose Festivals page, then open Festival listings and page wording.
- Expand a festival to change it, or add a new festival to the list.
- Enter its name, First day, Last day and website link. For a one-day event, use the same date twice.
- If you add a featured poster, also enter Featured festival: last day.
- Choose Publish → Publish now.
The date range and month headings update from the listings. Each festival and dated featured poster hides after four complete days following its last day. For example, a festival ending 30 September stays through 4 October and hides on the next daily update on 5 October.
Hidden festival listings stay in the editor for reference. You can remove them from the list manually. The daily website refresh must remain enabled in GitHub Actions.
Other sections
- News: add a story, date, wording and optional photo.
- Magazine: update the latest issue and cover.
- Socials page: update the introduction and contact details. Add individual trips in Events & Meetings and choose Social.
- Pubs of the Year: update the winners. The overall winner’s photo also updates the homepage.
Calendar downloads
Visitors can press Add to calendar on event pages. Enter a clear time such as 19:30 or 7:30 pm. If the time is unknown, the calendar download saves the date only. Downloads do not automatically update if the event later changes.
New editor tools
Create a form while writing
Under Attach a form, choose Create a form. Give it a name, add questions, then select Save form and attach. Your event or news draft stays open. Publish the entry when you are ready. The form itself is saved separately.
Preview your draft
Choose Preview draft at the bottom of the editor. Use Mobile or Desktop to check the content, then Close preview to keep editing. This preview does not publish anything.
Check what is live
After publishing, choose Check live status. Saved means your content is stored. Updating means Netlify has not published the latest changes yet. Live means the production deployment matches the latest saved website version. Unsaved edits remain drafts.
Handle responses together
Open Form entries, expand an entry, select New, In progress or Completed, add a private note and save. Notes show who last updated them. If another editor changed the entry, refresh before trying again.
Ask only relevant questions
For a form question, use Show this question to choose Always, Booking request, General enquiry or Nomination. The public form will ask the visitor which request they are making and show only the matching questions.